Skip to content
 In an emergency, quick and easy exit access can save lives. Panic exit devices, often known as panic bars or crash bars, are designed to provide a swift and safe way to exit a building during a crisis. These devices are a crucial safety feature in commercial and public buildings, ensuring compliance with safety regulations and enhancing overall security.
Whether you’re a business owner, a facility manager, knowing how to install a panic exit device properly is essential. In this blog post, we’ll walk you through the process, providing detailed steps and tips to ensure a successful installation.
How does a Panic Exit Device work?
A panic exit device works as follows:
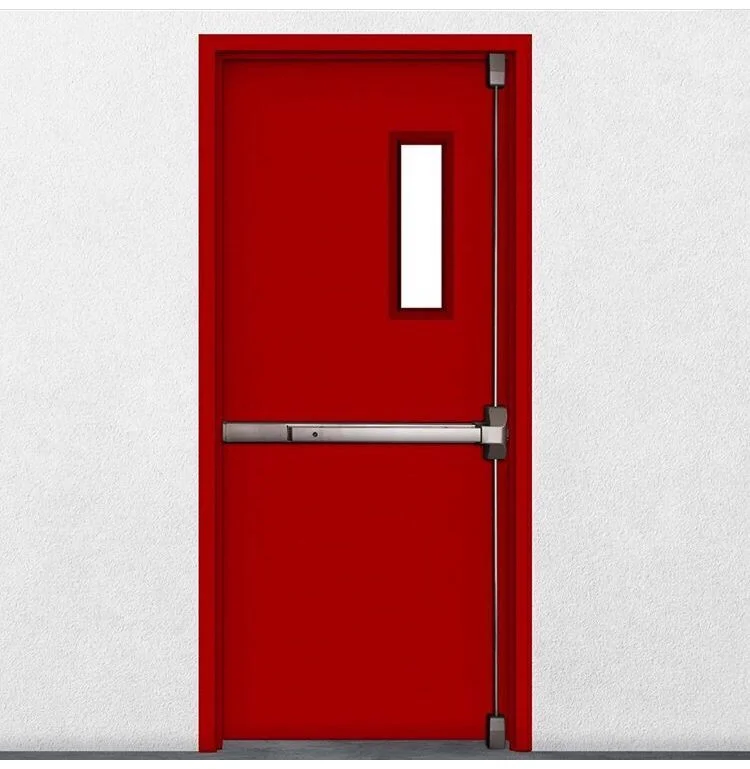
- External Structure and Activation: The device is usually a horizontal bar that runs across the inside of an exit door. When a person applies pressure to the bar, either by pushing or leaning on it, this action triggers the release mechanism. The force applied by a person’s body weight or direct push is designed to be easily achievable, even in a panicked state, allowing for quick exit.
- Internal Mechanism: Inside the device, there is a latch or locking mechanism that is connected to the bar. When the bar is pushed, it mechanically operates a series of levers or linkages. These levers disengage the latch from the door frame, releasing the lock and allowing the door to open. Some panic exit devices may also be connected to an alarm system. When the bar is pushed, it not only unlocks the door but also activates an alarm, which can alert security personnel or other occupants of the building to the fact that the emergency exit is being used.
- Door Opening and Egress: Once the latch is disengaged, the door can be opened easily. In the case of double doors, there are often additional mechanisms to ensure that both doors open simultaneously and smoothly. This allows people to exit the building quickly and safely in the event of an emergency, such as a fire or a security threat. The doors are typically designed to open outward, in the direction of egress, to prevent people from being blocked by the door as they try to escape.
After realized how the panic exit device works, we know quite well how to install panic exit device properly will help panic exit device work well.

Tools and Materials Needed
Before you start, gather all the necessary tools and materials. Having everything ready will streamline the installation process and help you avoid unnecessary interruptions.
Tools:
• Drill
• Screwdriver (Phillips and flathead)
• Measuring tape
• Level
• Pencil or marker
• Hacksaw (if cutting is required)
• Safety glasses and gloves
Materials:
• Panic exit device kit (including the bar, mounting brackets, latch mechanism, screws, and end caps)
• Manufacturer’s instruction manual
• Lubricant (for maintenance)
Panic Exit Device Install Preparation
Safety First: Safety is paramount. Wear safety glasses and gloves to protect yourself from debris and sharp edges. If you’re working in a busy area, ensure the workspace is clear of obstacles to prevent accidents.
Read the Instructions: Each panic exit device may have unique installation requirements. Carefully read the manufacturer’s instructions included in your device kit. Familiarize yourself with the parts and the steps involved.
Gather Materials: Lay out all the tools and parts you’ll need within easy reach. Check that you have everything listed in the instruction manual.
Step-by-Step Installation Guide
1. Mark the Door
• Measure and mark the correct height on the door where the device will be installed. Typically, the recommended height is around 40 inches from the floor.
• Use a level to ensure your markings are straight. This step is crucial for the proper alignment of the device.
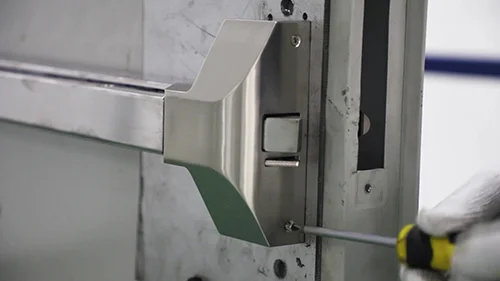
2. Attach Mounting Brackets
• Position the mounting brackets on the door at the marked locations. Hold them in place and mark the screw holes.
• Drill pilot holes at the marked spots. This will make it easier to insert the screws and prevent the wood from splitting.
• Secure the mounting brackets to the door using screws. Double-check with the level to ensure the brackets are perfectly aligned before tightening the screws fully.
3. Install the Panic Exit Device
• Attach the main body of the panic exit device to the mounting brackets. Align the holes on the device with the brackets and insert the screws.
• Ensure the bar is level and securely fastened. It should be firmly in place but still allow smooth operation when pushed.
4. Connect the Latch Mechanism
• Position the latch mechanism on the door frame, ensuring it aligns perfectly with the panic bar.
• Mark the screw holes for the latch, then drill pilot holes.
• Secure the latch mechanism with screws. Test the alignment by pushing the panic bar to see if the latch retracts smoothly and the door opens without obstruction.
5. Test the Device
• Thoroughly test the panic bar to ensure it operates smoothly. Push the bar multiple times to check its responsiveness.
• Make any necessary adjustments to ensure optimal functionality. The bar should push easily and the door should open without any resistance.
Final Adjustments
• Check for Alignment: Ensure all parts are correctly aligned and there are no obstructions to the device’s operation. Misalignment can cause the device to malfunction, compromising safety.
• Tighten Screws: Go over all the screws and tighten them securely. Avoid over-tightening, as this can strip the screws or damage the door.
• Apply End Caps: Attach any provided end caps to cover exposed parts and screws. This not only improves the device’s appearance but also enhances safety by covering sharp edges.
Panic Device Maintenance Tips
Regular maintenance is key to ensuring the longevity and functionality of your panic exit device.
• Regular Checks: Periodically inspect the device for signs of wear and tear. Look for loose screws, misalignment, or any parts that may need replacement.
• Lubricate Moving Parts: Apply lubricant to the moving parts of the device to keep it operating smoothly. Be sure to use a lubricant recommended by the manufacturer.
• Ensure Compliance: Regularly verify that the device remains compliant with safety standards and regulations. This is particularly important in commercial and public buildings where safety inspections are common.

Troubleshooting Common Issues
Even with proper installation, you may encounter some common issues. Here’s how to address them:
• Misalignment: If the panic bar doesn’t line up with the latch mechanism, loosen the screws and adjust the alignment. Ensure everything is level before tightening the screws again.
• Loose Screws: Over time, screws may loosen due to frequent use. Regularly check and tighten all screws to maintain the device’s integrity.
• Stiff Operation: If the panic bar is hard to push, check for any obstructions or misalignment. Lubricate the moving parts and ensure the screws are not over-tightened.
Conclusion
Installing a panic exit device is a crucial step in ensuring the safety and security of any building. By following the detailed steps outlined above, you can confidently install the device, ensuring it functions correctly when needed. Regular maintenance and prompt troubleshooting will keep the device in optimal condition, providing peace of mind that your building is equipped to handle emergencies.
Additional Resources
For further assistance, consider these additional resources:
• Installation Videos: Many manufacturers offer video tutorials that can provide visual guidance through the installation process.
• Manufacturer’s Guide: Refer to the detailed installation guide provided by the manufacturer for specific instructions related to your device model.
• Customer Support: If you encounter issues or have questions, don’t hesitate to contact the manufacturer’s customer support for technical assistance.
Call to Action
We hope this guide has been helpful in installing your panic exit device. If you have any questions or need further assistance, please leave a comment below or contact our customer support team. We are 15 years manufacture experience factory of panic exit device, can provide you more safety tips and product information, explore our other articles and resources on our website. Stay safe and secure!
By following these guidelines, you’ll ensure that your panic exit device is properly installed and maintained, providing reliable performance when it matters most.